
Installing X-POD Software
Having assembled the control box PCB and the LCD display, connected them up and wired all the lights and sensors up to the control box it is now time to upload the software.
As there are 2 Arduinos involved there will be 2 separate programs that need to be uploaded. The 1st program is for the Arduino Nano which can be found in the control box and handles all the low level sensor monitoring and control. The 2nd program is for the Arduino Mega which can be found behind the LCD display and handles all the display rendering/touch control and logging via SD card.
Installing Arduino
Before we begin you will need to download and install the (free) Arduino IDE software. This is what is used to upload the X-POD software onto the Arduino's and can also be used to modify the software is needed.
1. Navigate to http://arduino.cc/en/Main/Software and scroll down to the download links and download the Windows Installer file (http://arduino.googlecode.com/files/arduino-1.0.5-windows.exe)
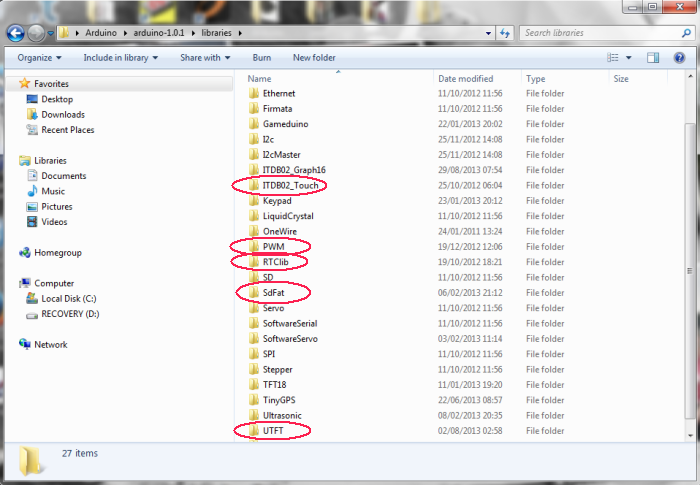
2. Locate the Arduino install folder (Mine is on the desktop, as you've used the installer yours will probably be here: C:\Program Files (x86)\Arduino) and open the libraries folder and unzip the following downloads and place them in this folder:
There will be other libraries in the folder, these do not matter as long as you have the 5 folders circled in Red installed there:
Control Box Software
1. Download the C5_Touch_Control_BoxV2.zip file and extract it somewhere. I usually have a folder called Arduino in the My Documents folder but you can put it where you like.
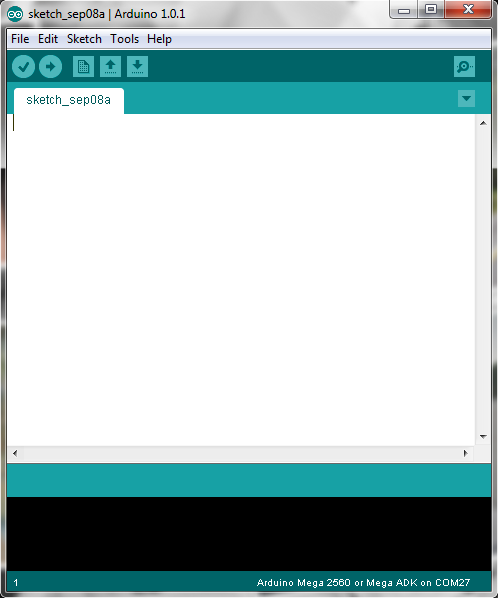
2. Start the Arduino editor:
3. Connect the Arduino Nano to the computer using the USB. Wait a moment whilst it installs the device drivers.
4. When the Arduino has been recognised and the drivers installed. Select the correct COM port for the Arduino from the Tools -> Seria Port menu:
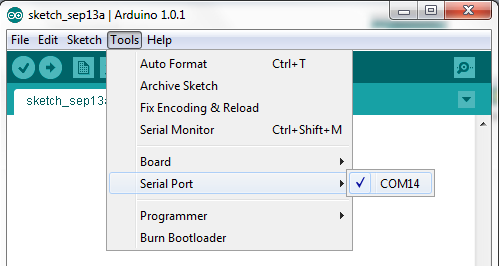
* Your COM port number will be different but it should be the only one in the list so select it.
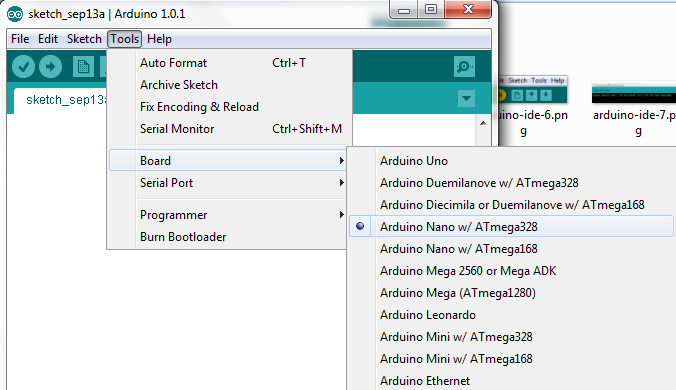
5. Ensure the correct board is set in the Tools -> Board menu. You want the Arduino Nano ATmega328:
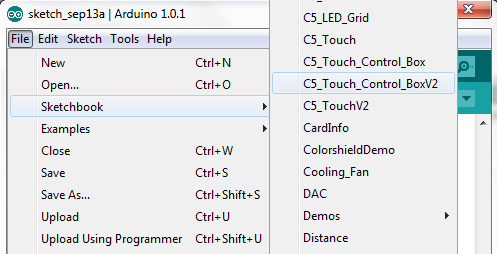
6. With those settings made, it's time to open the project up. Use the File -> Open menu to open up the project that you unzipped from C5_Touch_Control_BoxV2.zip. If you placed the Zip in the My Documents -> Arduino folder then you can open it by selecting File -> Sketchbook -> C5_Touch_Control_BoxV2:
7. When opened the program will appear and will look like this:

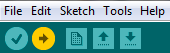
8. Now you're ready to upload to the Arduino. Simply click the Upload button:
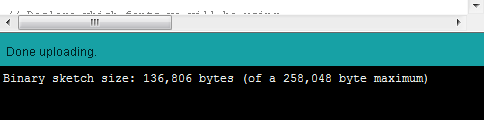
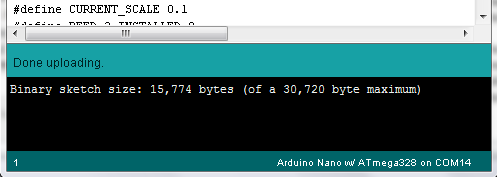
It will take a minute or so to upload, during this time the LED's on the Arduino will flash. Do not disconnect whilst it's uploading. When the uploading is complete you can disconnect the Arduino from the PC. The bar at the bottom of the Window will say "Done Uploading":
Congratulations you've uploaded the software for the control box.
LCD Touchscreen Software
Uploading the touchscreen software is a very similar process to uploading the control box software, the only differences are the board and software selection.
1. Download the C5_TouchV2.zip file and extract it somewhere.
2. Start the Arduino editor:
3. Connect the Arduino Mega to the computer using the USB. Wait a moment whilst it installs the device drivers.
4. When the Arduino has been recognised and the drivers installed. Select the correct COM port for the Arduino from the Tools -> Seria Port menu:
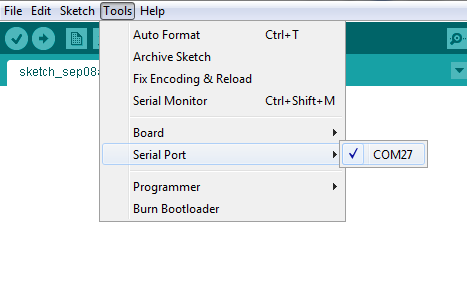
* Your COM port number will be different but it should be the only one in the list so select it.
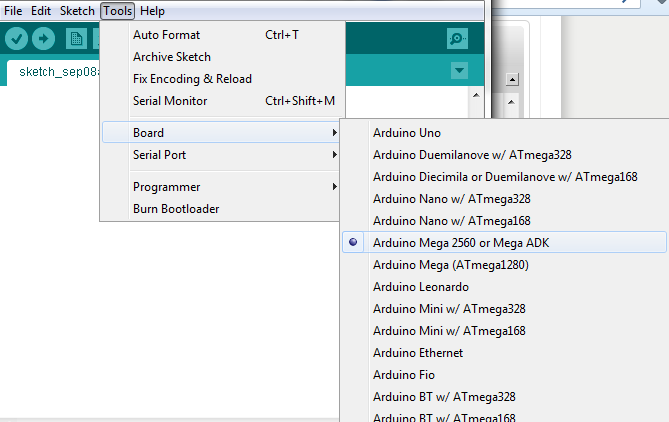
5. Ensure the correct board is set in the Tools -> Board menu. You want the Arduino Mega 2560:
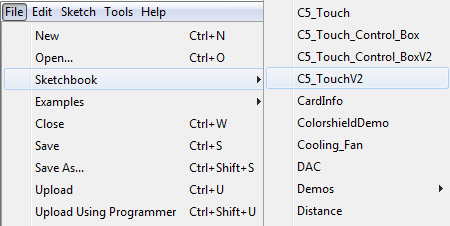
6. With those settings set, it's time to open the project up. Use the File -> Open menu to open up the project that you unzipped from C5_TouchV2.zip. If you placed the Zip in the My Documents -> Arduino folder then you can open it by selecting File -> Sketchbook -> C5_TouchV2:
7. When opened the program will appear and will look like this:
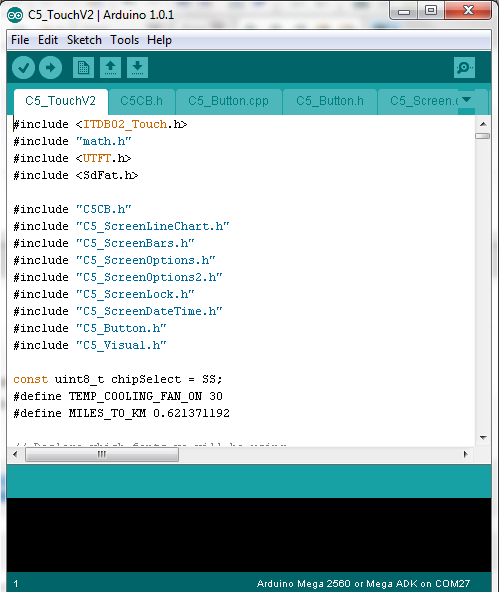
8. Now you're ready to upload to the Arduino. Click the Upload button:
It will take a minute or so to upload, during this time the LED's on the Arduino will flash. Do not disconnect whilst it's uploading. When the uploading is complete you can disconnect the Arduino from the PC. The bar at the bottom of the Window will say "Done Uploading":