


Restoring a Sinclair C5 on a Budget
When looking to buy a used Sinclair C5 (usually on Ebay) you either buy a scruffy looking neglected one fairly cheaply or a nicely restored one at extra cost. I have in the past, because of the cost, gone for the old, beat up ones and repaired them myself. I prefer this route as I then know exactly what has been done to the C5 when I've finished it and also because it's a great learning experience and a lot of fun.
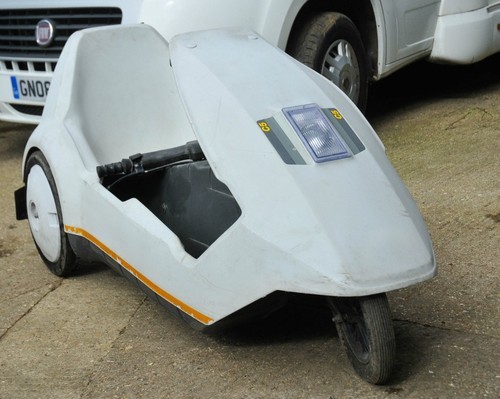
Here I will detail a restoration I did on a Sinclair C5 purchased from Ebay for £200. I aimed to restore it for under £80 using mostly items found on Ebay. To the right is the C5 as purchased. A little neglected, the shell was dirty with grease and dust. The front wheel cover appears to be missing, the rear wheel inner caps are missing, and it was sold as not tested so theres no way of knowing if the motor, control box or POD are kaputt.
For £200 it may have seemed a bit of a risk, but C5's, in this sort of condition will usually sell for around the £200 mark so I was happy to bid upto that amount. In the end I was the winner and promptly drove the 86 mile round-trip to collect it.
One suprise when I collected it was that it actually did have a front wheel cover which the seller had neglected to add to the listing which has saved me having to source an, often expensive, replacement.
Restoring It
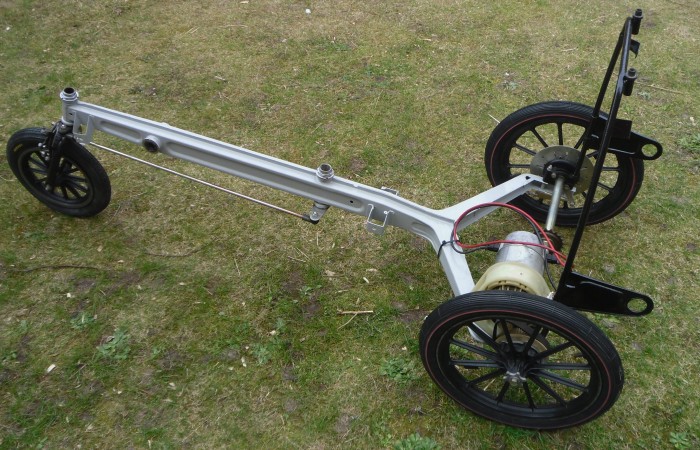
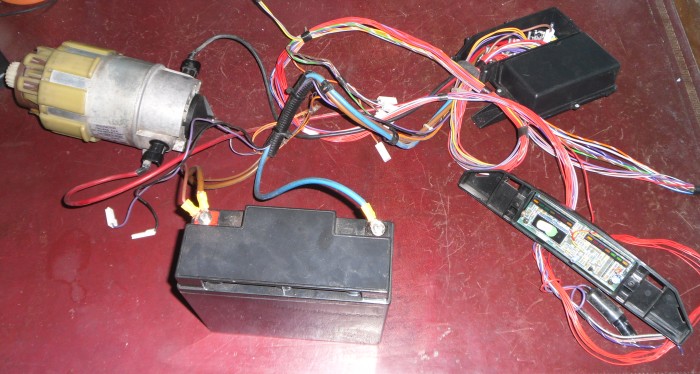
Having got it back home and safely into the garage, I had a closer inspection of the back (after removing the boot), there was some rust on the chassis and the Black support frame but nothing that couldn't be treated. The previous owner had cut off the original Sinclair C5 Keyswitch and added ring terminals to the cables so I connected them directly to my LiFePO4 battery which directly accepts such terminals.
The POD didn't illuminate and a click of the motor switch on the handlebar didn't activate the motor. Oh well, it was time to dismantle it and test the electrics indoors. They could be tested and repaired without removing them but the indoors is much warmer than the garage!
With the shell removed and the chassis, axle, steering and brakes removed and lightly sanded I painted the chassis with Rust Cure (£9.99 Ebay) and finished it off with a light grey spray paint (£2.99 Ebay). The Black support frame at the back was slightly rusted so again, this was lightly sanded and Rust Cure was applied followed by a coat of Black spray paint.
The chassis ball bearings (4 sets) were cleaned and re-greased along with the axle bearings and motor gear box.
Brakes, Cables and Blocks
The front brake was damaged and needed replacing and original brake cables on a C5 should always be replaced. Again Ebay to the rescue and a set of 2 Caliper brakes, cables and blocks costing £9.99 solved the problem, although they were chrome and the originals Black, as they couldn't be seen I didn't think it mattered. As I only needed 1 I have a spare set for a future restoration.
POD and Control Box
With all the electrics inside I could diagnose the problem with the POD and the none-working motor. After a brief look at the Control Box I could see Diode D1 was blown (0.99p from Ebay) once replaced I moved onto the POD. This didn't seem to be getting power from the Control Box (+5V), so using a multimeter and doing some continuity tests on the connector going back to the control box it became clear something was wrong with the connector.
After many years outside, or in a damp, cold garage the connector pins were dirty and didn't contact with the cable correctly. This was easily fixed with some electrical contact cleaner (£4.99).
| Item | Cost |
|---|---|
| Sinclair C5 | £200.00 |
| Rust Cure | £9.99 |
| Light Grey Spray Paint | £2.99 |
| 2 Caliper brakes, cables and blocks | £9.99 |
| Control Box Diode D1 | £0.99 |
| Electrical Contact Cleaner | £4.99 |
| Cillit Bang | £3.99 |
| 12V Relay (70 Amp) | £6.49 |
| Security Keyswitch | £9.98 |
| Bright White LED Lights X2 | £2.49 |
| 16" Raleigh Chopper Tyres X2 | £3.99 |
| 12" Kenda Tyre | £5.99 |
| 16" Innertubes X2 | £2.98 |
| 12" Innertube | £3.85 |
| Yellow Side Stickers | £6.99 |
| Total | £275.70 |
| * Links to most of these items can be found in the ever growing, Online C5 Shop. | |
The POD then sprung back to life when next turned on, as it was now getting power from the Control Box. Pressing the handle bar activated the motor which was a good sign. One problem was 2 of the LED's on the POD were not working. A quick examination of the back of the circuit board revealed broken solder joints connecting the LED's to the PCB. Once the broken solder was removed and some new solder added to ensure a good connection the POD was fully working.
I have found bad connections between the POD and the Red connector cable plus broken solder joints are the main culprits with a none working POD. More common than broken ULA chips in my opinion.
Broken Sinclair C5 ULA Chip
Now, this time I was lucky, the ULA chip in this C5 appears to be in good working order but others buying untested C5's may not have the same luck. In the years ahead this ULA may become unreliable too, so a permanent solution needs to be found to replace the ULA with a modern component that does the same job. That is why I'm working on a POD replacement board using an Arduino Nano to emulate the ULA's functions, this I'm hoping will be finished soon.
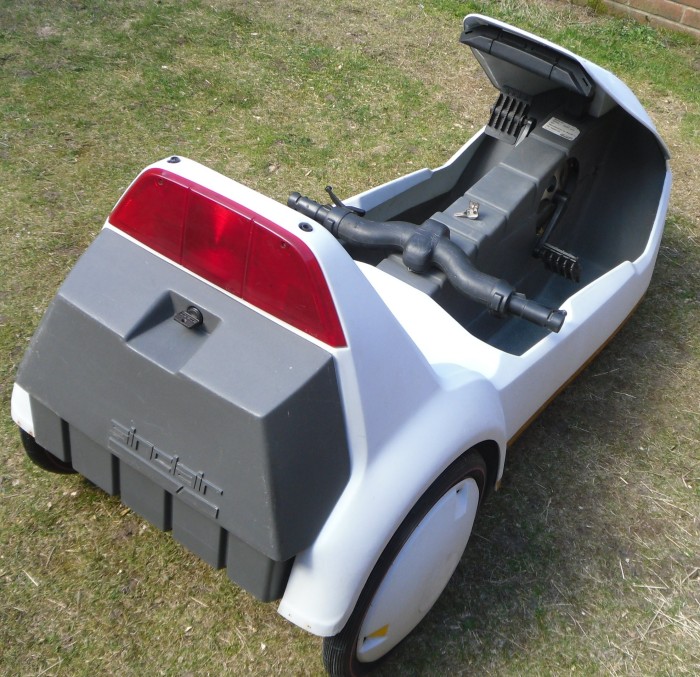
Cleaning the Shell
For this I tend to use Cillit Bang (£3.99) and a bit of light sanding to smooth out those gashes and scratches (common on well used Sinclair C5's) to be very effective.
Electrics
With the C5 re-assembled it was time to add connectors to allow the C5 to run from a regular car battery. A popular method is to run them though a 12V relay (£6.49 Ebay) which is activated via the existing light switch and have the lights remain on all the time (replacing the light bulbs with low energy LED bulbs is necessary here, see below). On this repair, for extra security, I added a security keyswitch (£9.98 Ebay) in the centre, under the POD. This controlled the power going to the relay making it a little more secure.
Replacing the old, power hungry light bulbs is always a good thing to do. Not only do they use a lot of power they also generate a lot of heat. There have been stories of the front light melting because of the heat. I usually replace them with bright White LED lights (£2.49 for 2 from Ebay). When installing LED lights, remember they only work one way, so if you insert it and it doesn't work just switch it around.
Tyres and Innertubes
The two 16" rear tyres were replaced with Raleigh Chopper tyres (£10.98 for 2 Ebay) which look great on a C5, the 12" front tyre was replaced with a Kenda type (£5.99 Ebay). Innertubes 16" (£2.98 for 2 Ebay) and 12" (£3.85 Ebay) were purchased to replace the existing ones.
Side Stripes
The side decals were a bit worn and need replacing, luckily there's very similar High Intensity Reflective Tape (£6.99 Ebay) 5M long that can easily do both sides of the C5 with some to spare. The tape is 0.5cm taller than the original but it looks good whether you decide to trim the extra off or not and the pattern is virtually identical to the original.
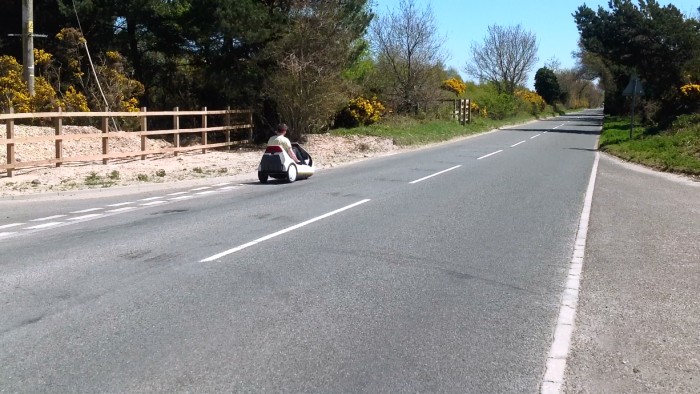
Taking it for a Run
With the C5 put back together, what better way to test it than to take it for a long drive. My favourite place is a long, relatively level, with only gentle inclines, 4 mile stretch of little-used road in Dorset.
Conclusion
Buying a cheaper run-down C5 and restoring it isn't for everyone, but for those who don't mind investing plenty of time and a some cash, it's great fun. The total restoration cost will differ for other C5's, I already had some items to fix the electrical problems, soldering iron, multimeter, grease, high power electrical cable etc.
